 Tweet
Tweet
Lurte på å kjøpe en kompis sitt.... han skal ha 3500,- for det... er det verdt det? elementet skal være i bra stand. er det noe negative sider med det eller anbefales det heller ett 18" element i nådagens produksjon heller?
-
-
herlige basser det. men trenger meget store kasser for å spille bra.Cerwin Vega! Pioneer -
Ok, ja blir nok ei stor kasse baki en oldsmobile... såg for meg ei slot/slisseport kasse kanskje..Comment
-
vet ikke så mye men kan jo dele noe. funker dårlig med thru technology hammer forterker forsterken har en tendens til og ta kvelden som cv flest er det jo høy morro faktor på det men ikke noen SQ basser akkurat , men mye morro, veldig fart i den, men spiller noe hardt og ikke romlignen til cv flest. bør ikke has inni qupen da det ikke akkurat er noen pen lyd rett fra elementet men funker bra i f.eks en sedan, synes vel også kanskje prisen var litt stiv da dem begynner og dra veldig på årene
spiller: pioneer p88
forsterken har en tendens til og ta kvelden som cv flest er det jo høy morro faktor på det men ikke noen SQ basser akkurat , men mye morro, veldig fart i den, men spiller noe hardt og ikke romlignen til cv flest. bør ikke has inni qupen da det ikke akkurat er noen pen lyd rett fra elementet men funker bra i f.eks en sedan, synes vel også kanskje prisen var litt stiv da dem begynner og dra veldig på årene
spiller: pioneer p88
front: Hertz MLK 165
sub: polk sr104 x2
forsterkere: mosconi AS200.4 og dynabel 7501Comment
-
Hadde en del Strokere når de kom og i mine ører hadde de faktisk potensiale til å spille helt greit også lydmessig, forutsatt at de var montert i riktig kasse. Men dog synes jeg 15" var den som fungerte best av Strokerne, 18" lagde ett heftig lydtrykk med nok effekt men 15" spillte bedre, 12" fikk jeg aldri til å fungere noe særlig.
Men prisen på 3500 var vell noe drøy synes jegComment
-
Stroker er mere SQ-bass enn mye på markedet i dag, forutsatt at det bygges riktig. Lett membran og stor motor er en fin oppskrift for bra bass det!
Lettdreven og morsom bass. Den må ha stor kasse, 150-200liter og bør tunes lavere enn anbefalt fra CV hvis det skal spille glættlyd..
synes som flere her at 3500 er litt drøyt, om ikke den er "ny". Man får ikke tak i deler (reconingskit) til disse lenger.
Det finnes mye annet som er mere morsomt og som tåler mer juling for tiden. DD 15" eller 18" f.eks..?[SIZE="3"][B][FONT="Trebuchet MS"]Joakim Skovlund[/FONT][/B][/SIZE]
[SIZE="2"][B][COLOR="DimGray"][FONT="Trebuchet MS"][/FONT][/COLOR][/B][/SIZE]
[SIZE="1"]Mobil: 943 55 200 - Epost:[EMAIL="joakim@skovlund.no"][COLOR=Blue]joakim@skovlund.no[/COLOR][/EMAIL][/SIZE]Comment
-
man får uorginale reconings kit til stroker. men membranen er en del lettere på de.
rundt 55gram eller noe om jeg husker rett
her er bilder av en som recona med det uorginale kittet
http://cerwin-vega-fans.com/forums/v...hp?f=15&t=2728Cerwin Vega! PioneerComment
-
The board requires you to be registered and logged in to view this forum.Originally posted by Reimers View PostMvh De som kjenner meg, kjenner meg. Hadde en gang en golf..
Team [B]d[/B]yna[B]B[/B]el
Prosjekttråden min: [url]http://www.bilstereoforumet.no/showthread.php?t=79[/url]
-Computer engineering is not rocket science…it’s probably closer to voodoo.-Comment
-
gjorde det enkelt her er hele posten hans :P
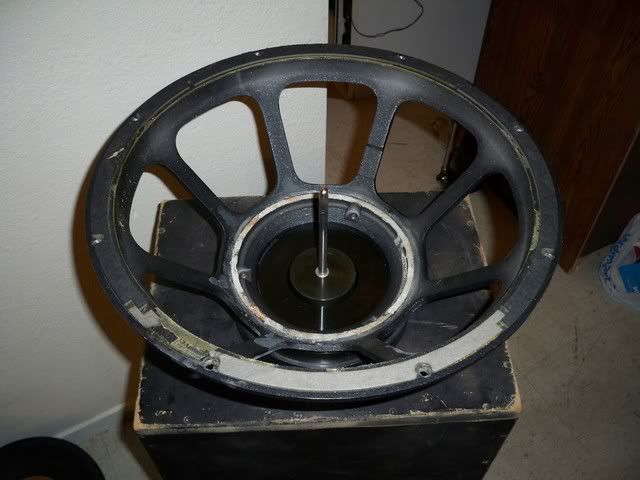
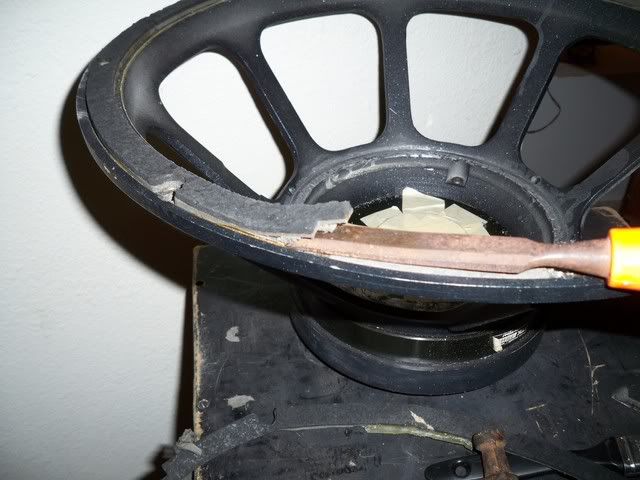
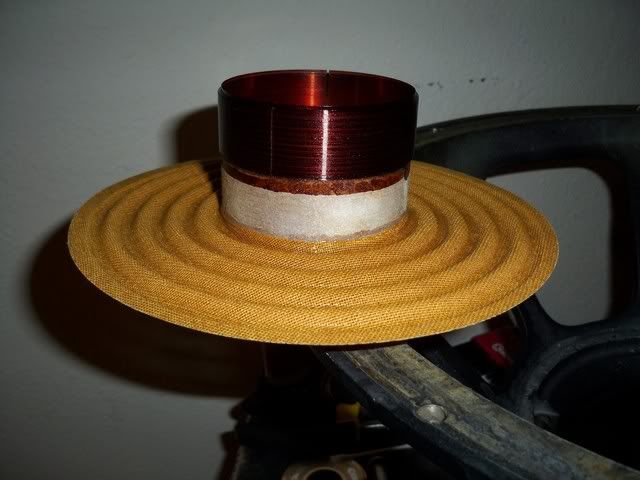
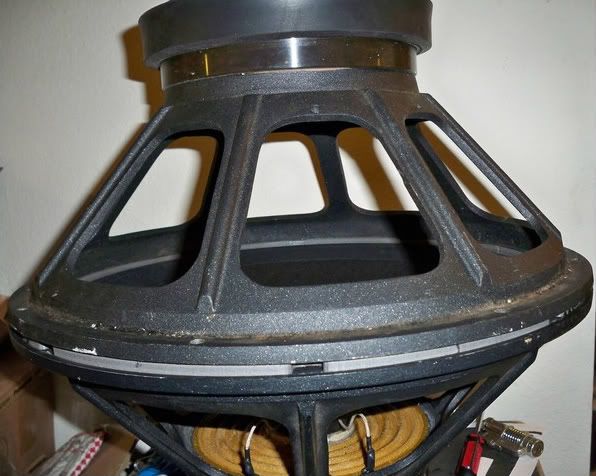
Here's what I'm starting off with--just the empty basket
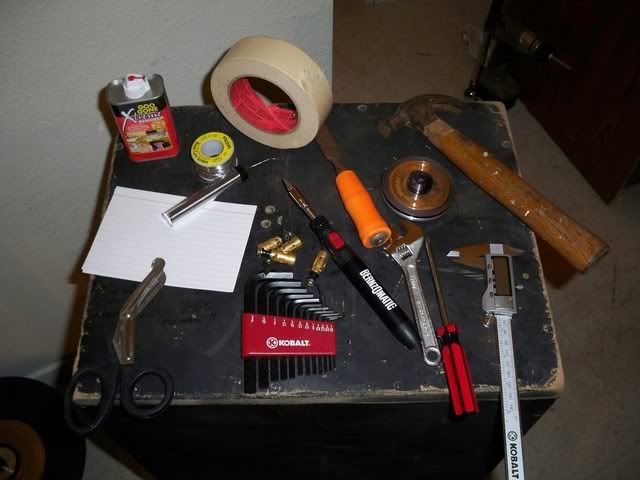
Things needed:
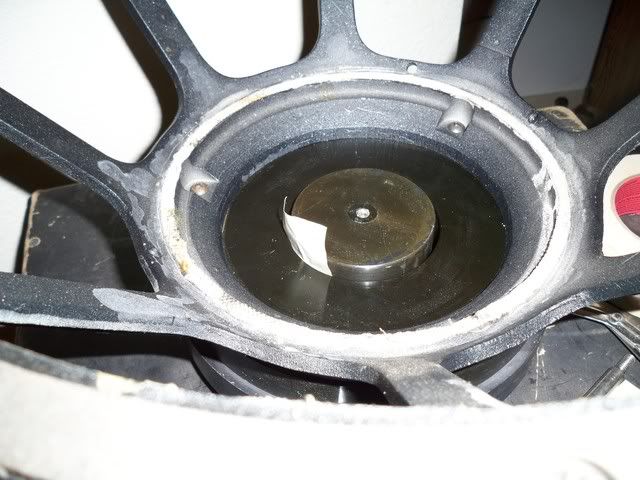
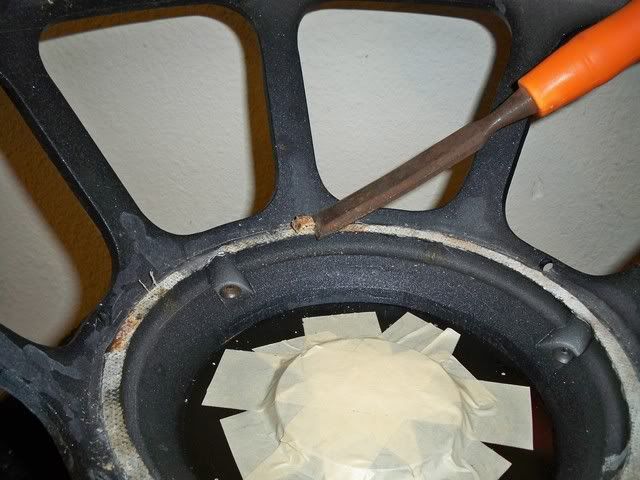
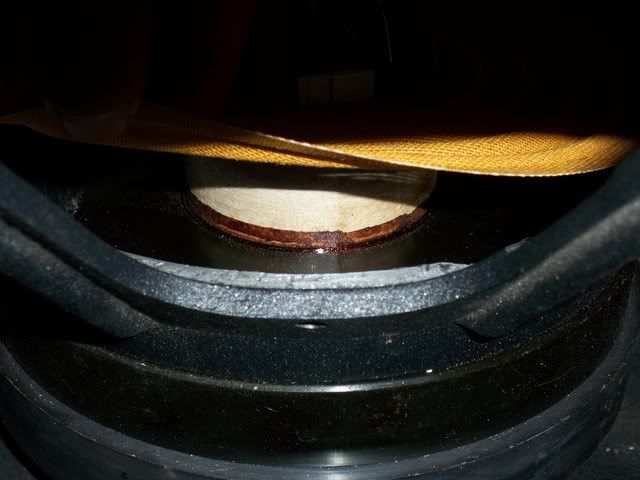
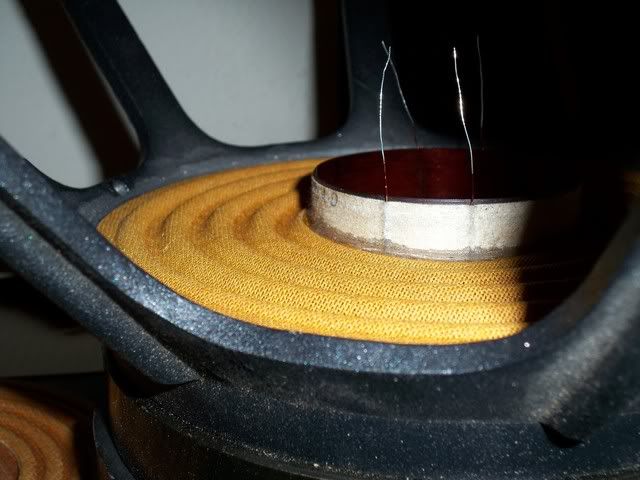
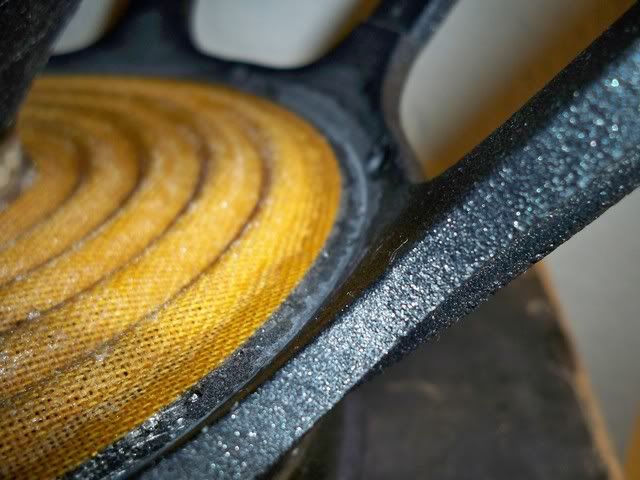
First step is to use the masking tape to clean the inside of the voice coil gap both on the pole-piece side and the top-plate side:
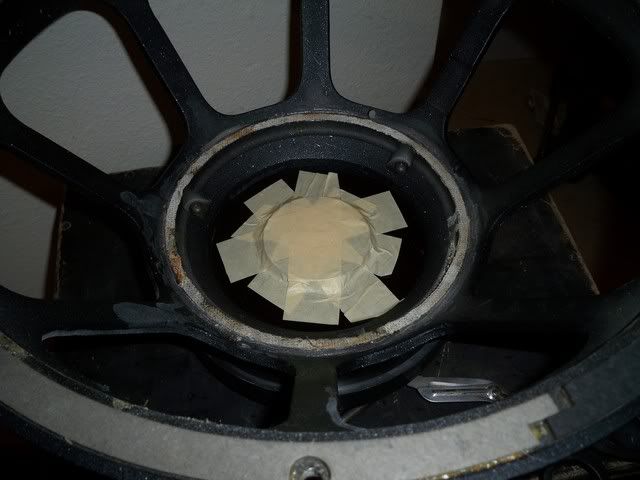
Once all particles have been fished-out with the masking tape, cover up the entire gap with tape to prevent any further debris from falling in:
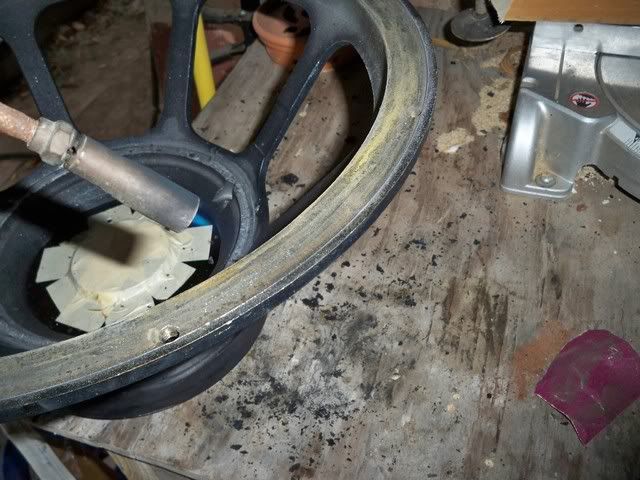
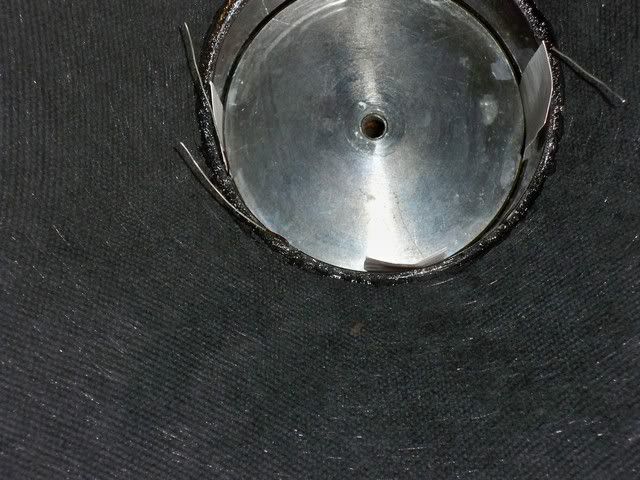
Next is to scrape off the remnants of the old spider off the frame:
The hardened glue seemed to come off easier by smacking the scraper radially-inwards:
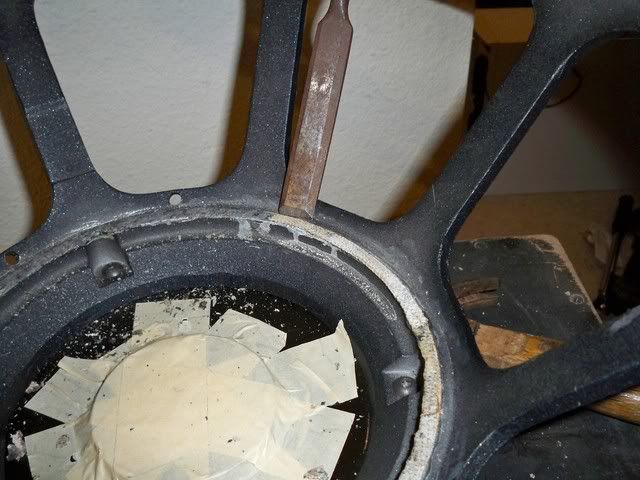
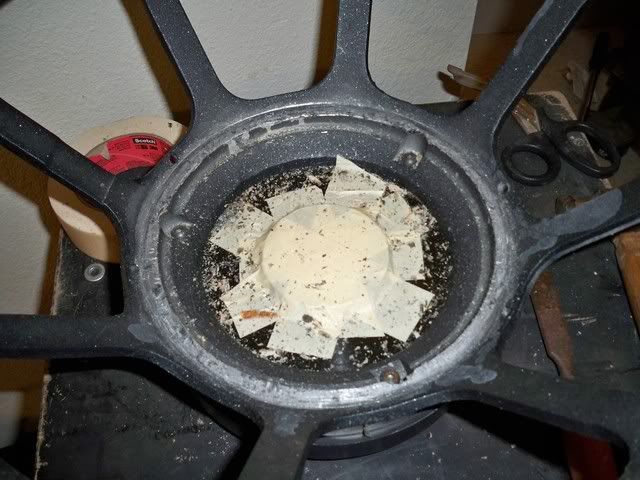
As you can see, there was a very good reason the magnetic cap was taped sealed, you get lots of debris from the hardened epoxy cracking off:
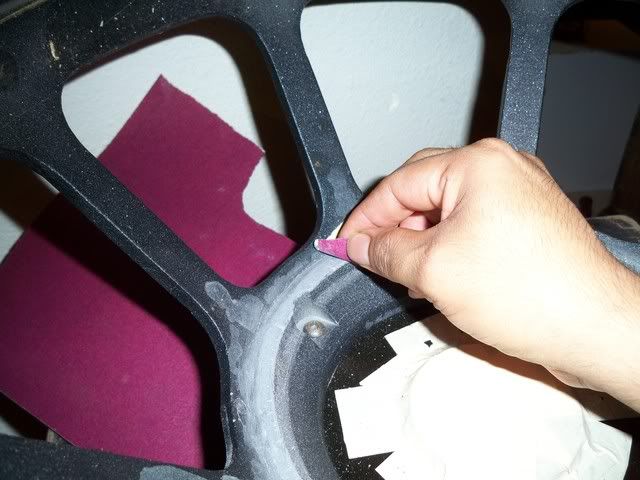
Next, cleaned the spider mounting flange with some 120-grit sandpaper to get rid the last of the epoxy and also roughen up the surface:
Next I proceeded to scrape off the old gasket:
Since the adhesive that is used on the gasket is different (non-hardening), it wasn't coming off cleanly with the scraper, so I just propane'd it off outside:
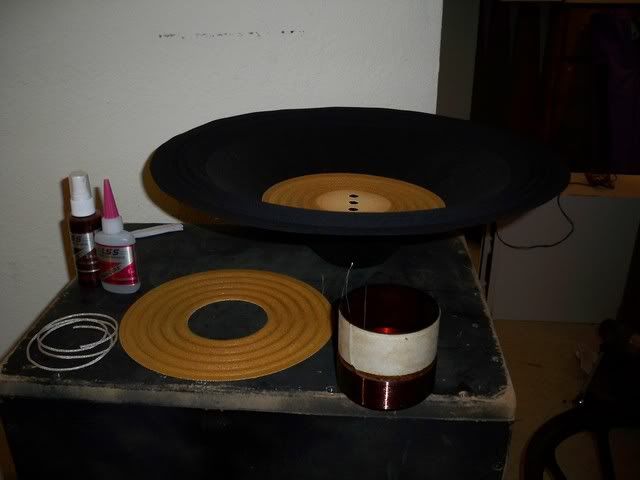
Now with the frame nice and clean, it was time to start the actual re-coning process. These parts are from http://www.legacysoundservice.com. Cone, voice coil, dual spiders, heavy-gauge tinsel lead, thick cryanocrylate voice coil adhesive, cryanocrylate accelerator, and strips of index cards that I cut up :
First step is to measure the top-plate thickness:
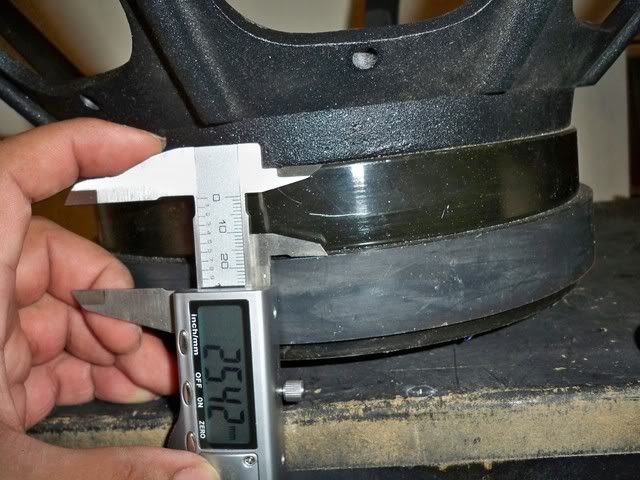
Then measured the voice coil length:
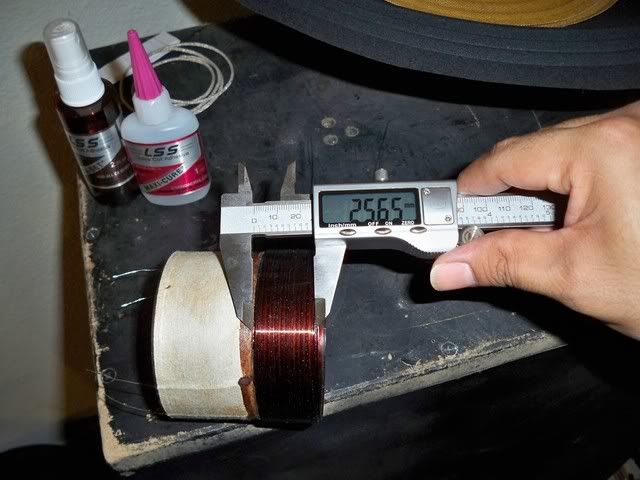
To set the voice coil in the magnetic gap, one must calculate the "overhang". Normally you take the length of the voice coil, subtract the top-plate thickness, and the remaining length is cut in half to determine the length of coil above the top plate. Since in this design, the coil length is equal (for all practical purposes) to the top-plate height, there are to be no coil windings above the top-plate.
To do this coil setting, I first slipped on the lower spider from the bottom-up, all the way up to the top of the voice coil former. The index cards you saw in the pic with the rest of the materials get cut up into strips and are to "lock" the coil in place, both centered in the gap AND at the proper height:
I needed to use double-strips, spaced 90° apart, to perform the dual-purpose of centering the coil and physically locking it at the proper height. Here you can peek at the coil windings just barely visible (because the camera is at an angle):
With the coil locked in place, I rotated the spider back and forth as I slowly slid it down the former so as to set the outer edge flat on the frame in a neutral position. With the spider in the proper location, I applied the adhesive to bond the coil former to the lower spider:
With just a small bead of adhesive, I applied a couple quick sprays of accelerator to set the adhesive. It's best to apply adhesive in small beads to avoid it running. Then removed it from the motor structure, turned it upside-down, and did the under-side of the spider-coil joint:
Then I applied another thicker bead of adhesive to the top joint (and accelerator):
Then slid the cone over the former, but not all the way to the bottom where the lower spider met the former. It went down only to the point where the surround just barely met the frame, so as to keep the cone in a neutral position (the index card strips are not doubled-up here since the coil height is now already set by the spider, they are only used for centering:
As a result, there was a gap between this cone (which is an RCF driver cone) and the lower spider. Adhesive applied at the outer cone-former joint:
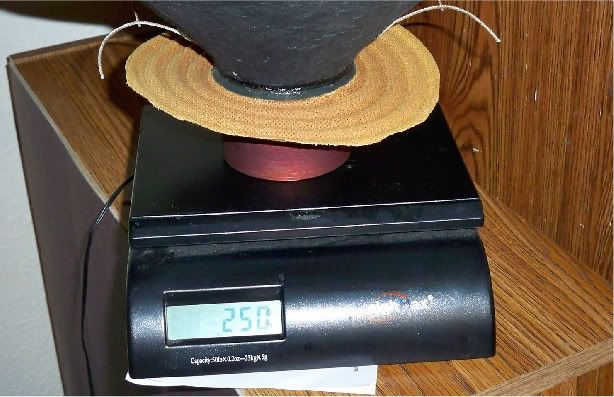
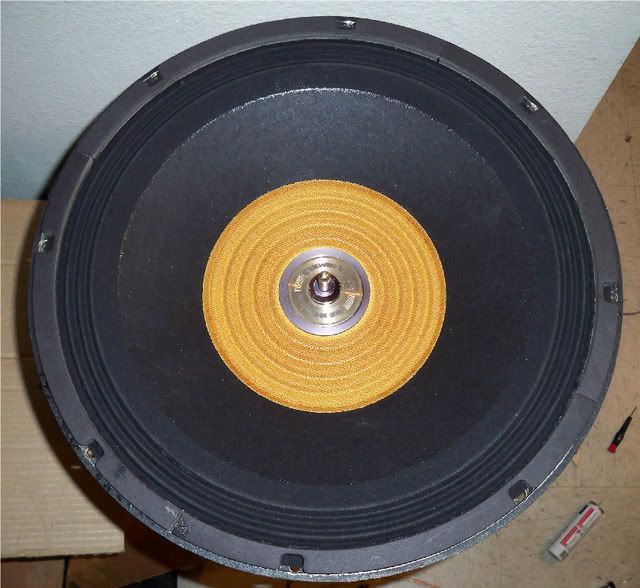
Now that the lower-spider/former/cone were effectively a single piece, I decided to weigh the whole thing to compare it to the original moving assembly from my other Stroker, since I could tell the cone was thinner. Here is the original assembly:
Here is the new assembly with the top-spider just placed on the cone:
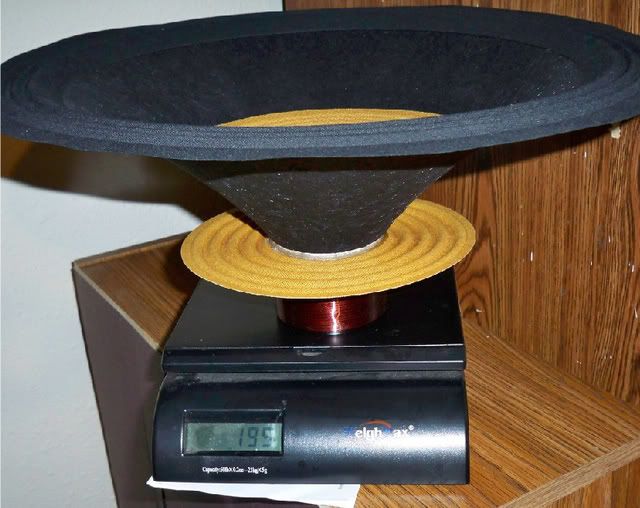
Since the new assembly was significantly lighter due to the cone, I decided to even things up a bit with this (more info later):

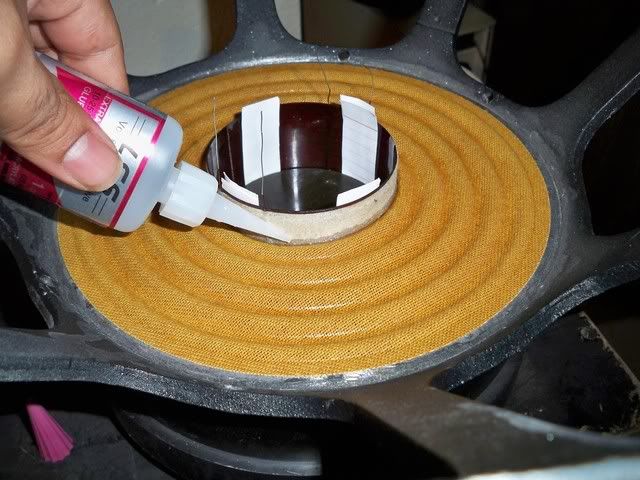
Now I set the assembly in place with adhesive on the underside of the lower-spider and quickly inserted 4 index card strips to center the coil once again (this is tricky because the adhesive started to set rather quickly so the centering must be done at once). Then applied a heavy bead on top of the outer edge of the lower spider:
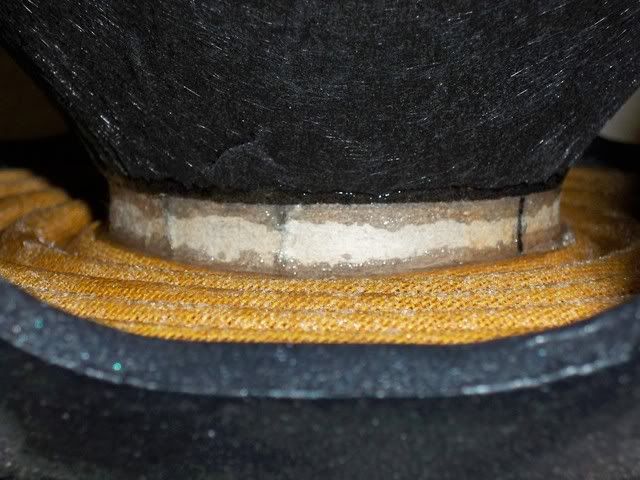
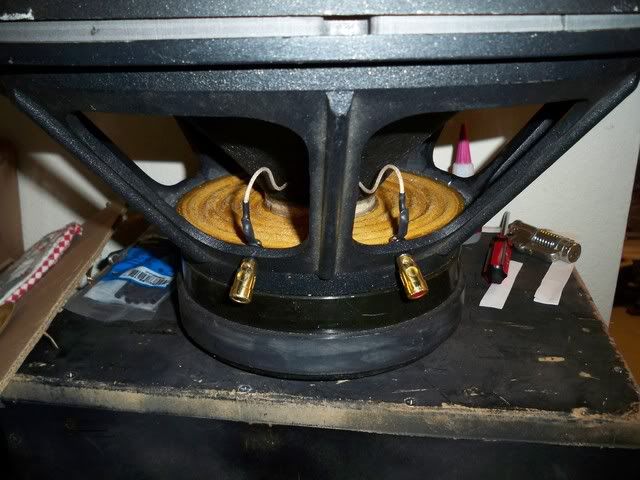
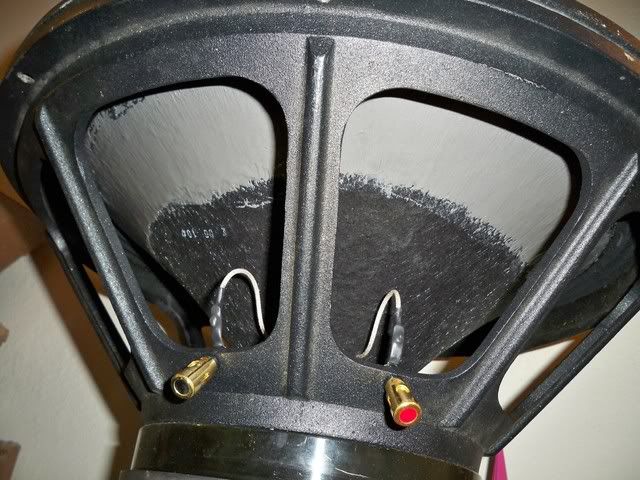
Once the lower spider outer-edge sets after spraying accelerator on it, I drilled 4 small holes to route the tinsel lead through the cone, used my butane soldering iron to solder the voice coil wires to the tinsel leads, and routed them to the terminals, and heat-shrunk the tab at the push-terminal:
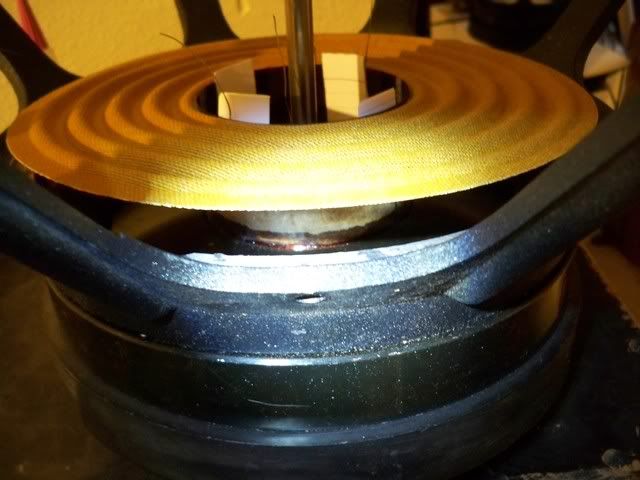
It's pretty much done. There's a couple extra steps for this speaker, but for most speakers, it's the bulk of the work. All that is left is to lift up the edge of the surround to apply adhesive, as well as applying adhesive on top of the surround to set the cardboard gasket. I used the same adhesive, but in restrospect I should have used perhaps a rubber-cement because at this point, the heater from the central air unit had come on and it started to set rather quickly (without accelerator) due to the warm air. I used my other Stroker on top of the gasket to apply pressure:
As for what I did with the JB Weld, I "brushed" it on the underside of the cone to give it some strength, since there would be no weight penalty compared to the original assembly. The reason for this is because the 18" models were particularly susceptible to cone-damage due to flexing at the outer edge near the surround because of the extremely strong motor structure:
I weighed it before I set it all in place, and it ended up around 230-235 grams.
EDIT: A couple more pics and things to look out for.
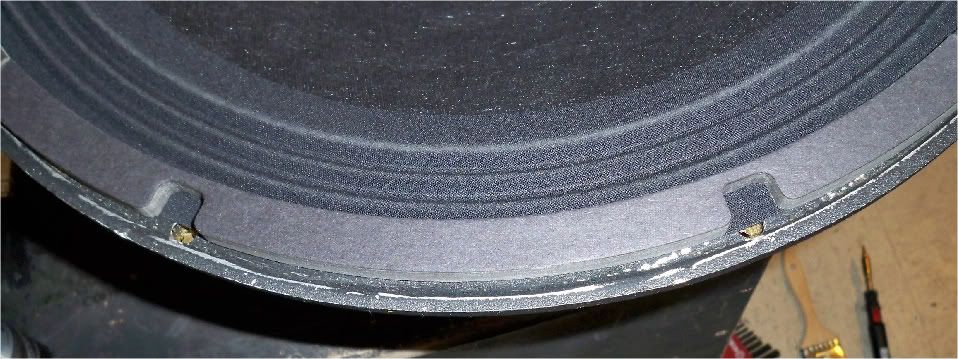
On the second Stroker 18 that I'm reconing, I opted for some rubber cement for the purpose of adhering the surround edge to the frame and the cardboard gasket on top of the surround. An issue I ran into with the first one I believed was caused by a mistake of mine when setting the surround/gasket with that fast-drying cryanocrylate adhesive--the gasket didn't quite set right, and here's why:
Seems that the included gasket was made for a speaker with a slightly larger frame, and you can see, if you fit the two edges of one gasket piece in place, the difference in radius of curvature between the frame and the gasket becomes apparent.
I shaved some material off the edges of two of the gaskets in my first recone to try and make sure all the bolt holes lined up, and it worked but this time around I went an extra step on ALL 4 gasket pieces:
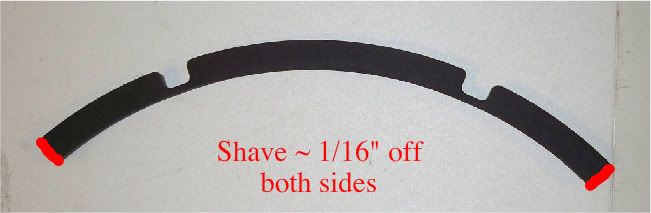
With that, the edges fit in much better, and the different curvature was dealt with more appropriately with a cheap plastic clamp set from Lowes, as not everyone will have an extra identical speaker to place atop the one being reconed to provide pressure for the adhesive to set:
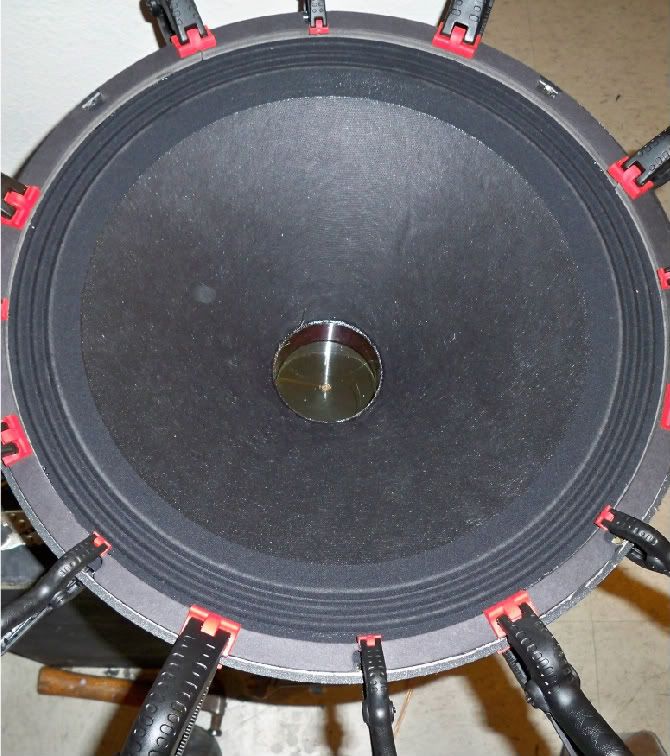
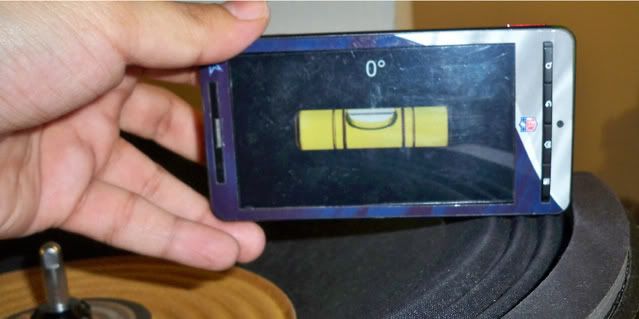
I also made sure the cone was in the correct position by using my phone and a "leveler" app:
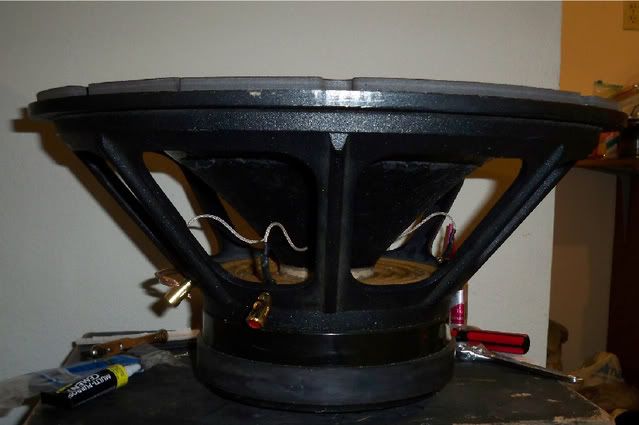
And there you have it. Clamped the top-spider in the mounting ring, installed the center pole w/ lower washer, and glued the top-spider to the cone at the outer edge (with adhesive on the underside), applied accelerator, and there it is:
 Cerwin Vega! Pioneer
Comment
-
En av de bedre subwooferne jeg har vært borti.
250l tunet til 27hz funket den subben veldig godt i.
Har Stroker reconingskit liggende om noen skulle trenge et slikt.
Det er Walter Hoffmann "approved". (Dvs han gikk god for det).
Har også en stroker i deler om noen ønsker.Runar E. Olsen ~ Moderator
Kia Cee'd SW 2011 - Blir snart SQ prosjekt.
http://www.signaturebar.com/uploads/images/67311.gifComment
Comment